
Nothing in Basket!
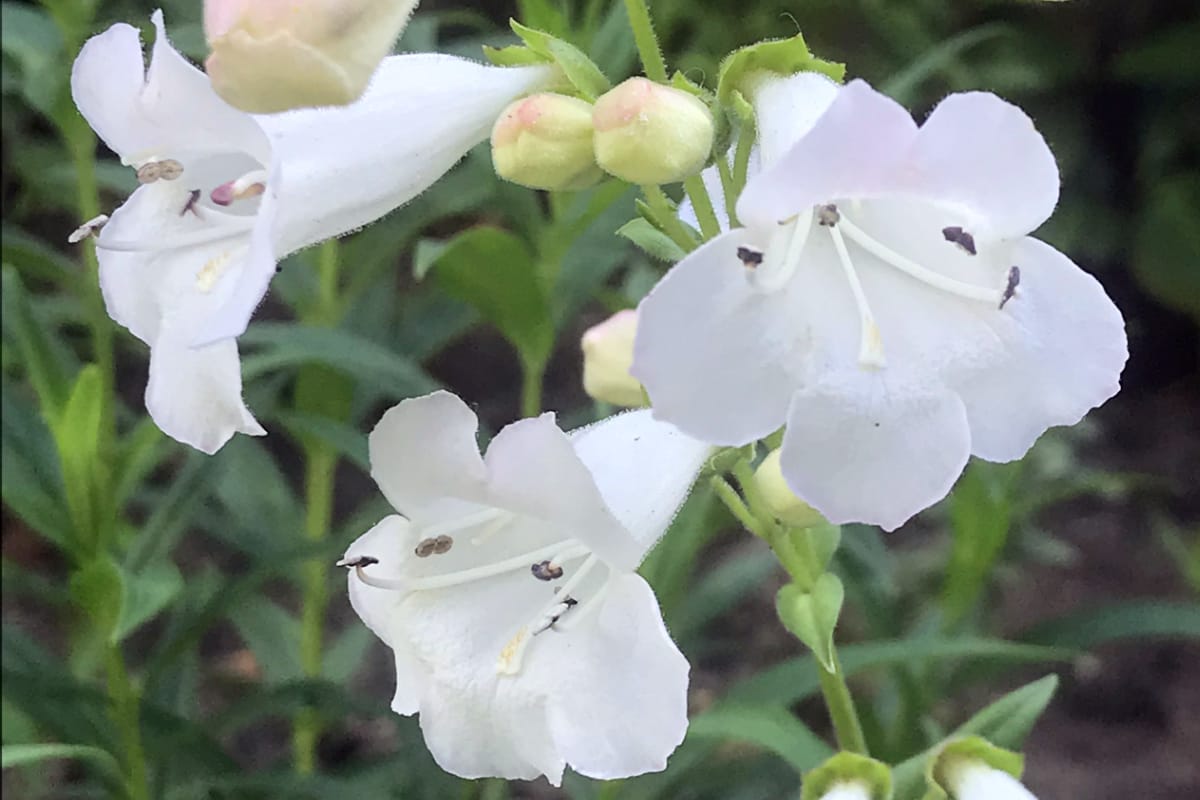
How To Grow, Prune and Propagate Penstemons
Loved by Bees, and the hummingbird hawk moths that visit our garden. Perfect for wildlife as well as sandy Suffolk soil
A Penstemon cutting from my mothers garden was my first introduction to gardening. It was a beautiful coral pink and to this day neither of us know it's name. Although the original plant has gone, we both took cuttings which has kept this beautiful flower in our gardens. Penstemons are incredible easy to grow and propagate making them a perfect plant for a new gardener.
Penstemons are a valuable garden plant and provide plenty of nectar. They are beautiful to look at, and create movement within a flower bed when the wind blows through their tall flowering stems. They also look fantastic in a prairie garden scheme. They are an elegant plant with spires of tubular flowers in a range of gorgeous colours. They can start flowering in June and can keep going well into November.
How to grow penstemons
Choosing penstemons
The perfect garden for penstemons is one that is sunny with moist but well-drained soil. Penstemons do best in fertile soil, but can cope with poorer soil, and may need watering during very dry spells. Penstemons grow perfectly in my dry sandy hot garden here in Suffolk, the ones that do the best and last the longest are 'Etna', 'Andenken an Friedrich Hahn', and Garnet.
When choosing penstemons look at how hardy they are to see if they will suit the area you live in. The thinner the leaves are the hardier the plant will be, helping it to survive cold winters.
Penstemons range from whites, through to pale pinks, dark pinks, purples, blues and reds. They also come in two tones. Picking the colour you want will depend on whether you want a matching bed of one colour, complimenting colours or something contrasting so it stands out.
When to plant penstemons
The best time to plant penstemons is from May to July. The soil will be warming up and the roots will quickly settle in as the plant starts putting on new growth. Planting them early in the year gives them enough time to establish roots before winter.
How to plant penstemons
Dig in some compost, around a bucketful per sq/m to a spade's depth over the entire area you wish to plant in. You can either use your own homemade compost or buy any soil conditioner or well-rotted manure, and apply the same amount in the same way.
I've found if you add the right plant to your soil you do not need to add improvers. I simply dig a hole, pop the new plant in, water, fill the earth back in around the plant and leave it to get on with it.
I like to plant a couple of penstemons together to give the appearance of a bigger busher plant.
Watering
Water well until the penstemon has become established. Established plants have been in their planted position for two to three years and have well developed roots which are able to support strong growth with healthy foliage and flowers.
Aim to water well and occasionally at the base of the plant, rather than a little and often.
An established plant may need watering every two weeks in prolonged hot dry spells. Next year I will be adding a Rocky Mountain Penstemon which is drought and flood tolerant to see how well this stands up to our changing climate. Rocky Mountain penstemon seed is included in my new American Prairie seed mix.
Again here in Suffolk with the hot droughts we keep having, where temps have been recorded as high 43c, some of my established penstemons that only get morning sun haven't needed to be watered. Garnet, Etna and Laura all seem to be very happy without it.
As with all plants in containers, if you choose to grow your penstemons this way, they will need watering more often. Water until it starts to come out of the base of the pot, only water again when you can feel the earth is dry down to 2.5cm. Placing a saucer under the pot will reduce the amount of water loss from the bottom.
Mulching plants in borders with well-rotted manure or your own home grown compost each spring should be sufficient. Simply spread your compost around the base of the plants. I don't dig in my homemade compost, I try to copy nature and lay it on top of the soil and let nature do it's thing. This way I'm not disturbing worms and other bugs that live and hibernate in the soil. Penstemons in pots will enjoy a general purpose fertiliser in spring.
Deadheading
Once flowers have died off the plant will start to produce seed heads. If you don't want seed heads, dead head the plant and you will get more flowers. Cut the stem back to where you can see side shoots emerging which will produce new flowers.
Over wintering
Cut back any faded foliage during September, October and November. You only need to take about a third off the stems to prevent wind rock, leaving enough behind to give it protection from frosts.
If you have tender penstemons it's worth taking some cuttings during August and September, if you do lose the plant over winter then at least you will have a new plant to replace it with. Keep the cuttings close to a wall, in a cold frame or greenhouse to protect them through winter. They can be planted out next spring.
Penstemons in pots will require bubble wrap around the containers if temperatures are going to get below it's hardiness range. Check the plants label when buying. Or check out the RHS website for temperature details for specific plants.
The use of greenhouses or cold frames can protect tender penstemons as well.
Caring for older plants
Penstemons don't look too good after 5 years, they become woody and don't flower as much. By taking cuttings in August and September you will always have something to replace an older plant with.
Pruning and training
It is recommended to prune penstemons back hard annually to avoid them becoming woody and leggy. This is best done in April and May after the last frosts.
Check the penstemons for new growth at the base of the stems, once they start to appear cut out all the old woody stems down to just above the new shoots. You can also cut the entire plant down to the new shoots, and it won't take long for it to reach it's full size again.
Propagating

Here, I am cutting a stem from the middle of a penstemon
In June, July & August you can take semi-ripe non-flowering stem from the middle of the plant and cut it just below a set of leaves so you have a length of 5cm to 10cm long.

This shows how long your Penstemon cutting should be
Remove the lower leaves and trim the top leaves in half, place them in pots of cutting compost, you should be able to get 5 cuttings in a 9cm pot, simply put the cuttings around the edge of the pot and put them in shade in a tray of water. I have put a cage over mine to stop the blackbirds from pulling all the mud out.

Here I am removing the leaves from the lower part of the cutting

This is how your penstemon cutting should look

Now cutt off the tips from the remaining leaves

Once you are at this stage, the cutting can be put into a pot and watered
Growing from seed is also worthwhile, you can allow your own plant to create seed heads and plant these. Plants grown from seed will be similar but not identical to the parent plant. Whereas cuttings are a clone of the parent plant which can limit diversity in your garden. Sow in spring in a seed tray with a cover and keep in a warm spot inside, they need a slightly humid warmer atmosphere to germinate.
Problems
Penstemons are generally a trouble-free plant, possibly why I love them so much. However, they can get powdery mildew and frost damage.
Always read the care label on any new plant you purchase.
Penstemons are fantastic for bees and other pollinators. To create a full wildlife haven, browse our range of pollinator-approved wildflower seeds.

About the Author & Content Disclaimer
The advice in this post is based on 10+ years of hands-on experience testing seeds in our sandy Suffolk Garden.
While I love sharing my journey and the things I discover, please understand that I am not a certified professional in gardening or wildlife. I ground my content by deep-diving into reliable books and expert resources, but please use my advice only as a guide for your specific garden.
I use and sell the same UK-sourced, wildlife-approved seeds in my own garden that you see throughout this site. Shop the seeds here.
If you notice any inaccuracies or have additional insights to share, please feel free to contact me via this website's contact forms.